11 Best SEO Tools To Boost Your Organic Traffic
Are you looking for the best SEO tools? Then, keep reading this article, and we will show you the 11 best SEO tools that won’t break your back or budget.
You should know that you don’t have to do all the heavy lifting your SEO campaign requires by yourself anymore. Even the top-level SEO experts aren’t getting by on their own. So why not free up your time and get more done by adopting the new wave in productivity that SEO tools sponsor? Here’s what you should consider.
Think of that cramping setback keeping you from dominating your niche, grabbing more opportunities, or simply getting by. What if you knew that it requires less effort to fix than you thought?. Even better, how would you feel knowing you don’t need to be an SEO expert to get started on it?. You don’t have to answer that yourself, too ─ the experts already have.
The best SEO tools listed here will show how experts have shamelessly used their help to get past competitors plenty of times and how to do it yourself. Even though there are eleven of them. Don’t worry about getting a ton of these gizmos. Just one of these SEO tools can help you strike the bull’s eye of your SEO goldmine.
Free vs. paid subscriptions.
Most of them are free ─ so don’t worry about breaking your budget. As for the paid subscriptions: you can take advantage of the free trial offers before making a purchase.
Best SEO Tools in 2023
Here’s a quick summary. In this article, we will be covering tools like:
- Ahrefs
- Moz
- Google Search Console
- Respona
- KWFinder
- Semrush
- BuzzStream
- Answer The Public
- UberSuggest
- SpyFu
- Yoast SEO
If you need detailed information regarding these tools, keep reading this article.
Ahrefs
Ahrefs is a helpful competitor analysis tool backed by an extensive backlinks database. As a result, it is one of the most preferred SEO tools. You can check which websites link to your competitors and use this information to jump on opportunities to gain a competitive edge in your industry.
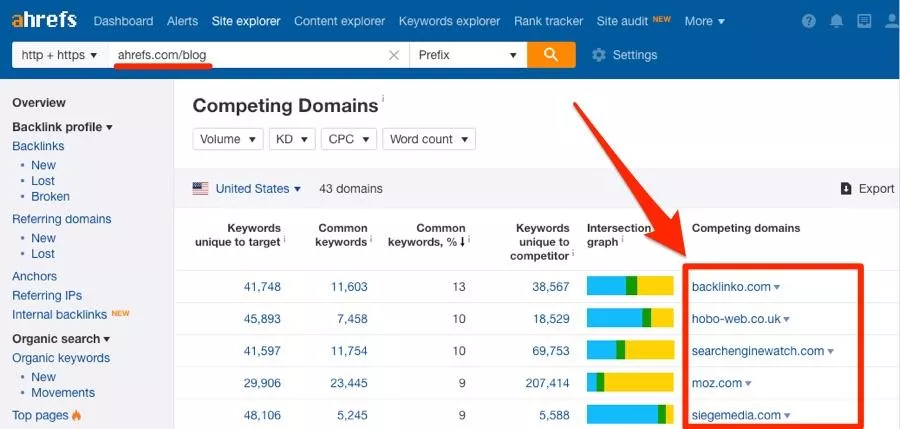
Its capacity to carry out revealing SEO audits is one of its most favored features. Gaining insight into what keywords your competitors are ranking for, what brand of content is doing well in your industry, and who is digesting it, and showing which key points you need to improve the efficiency of your website is expected from the Ahrefs keyword explorer tool.
That is not all you’re getting out of this. You can use the Ahrefs dashboard to monitor your website’s ranking, view your competitors, or monitor projects for your clients.
Here is what you can expect from an Ahrefs SEO Audit
- The rank of your backlink profile/(AR)Ahrefs Rank
- Total ranking of your backlink profile strength/Domain Rank
- Total number of backlinks
- Referring domains
- Rank tracking for both organic & targeted keywords
Features
- Domain comparison
- Batch analysis
- Link intersect
- Content gap
- Email alerts
- SEO toolbar
- WordPress plugin
- Word count
Pros
- Site explorer
- Keywords explorer
- Site audit
- Rank tracker
- Content explorer
Cons
- No free plan
Moz
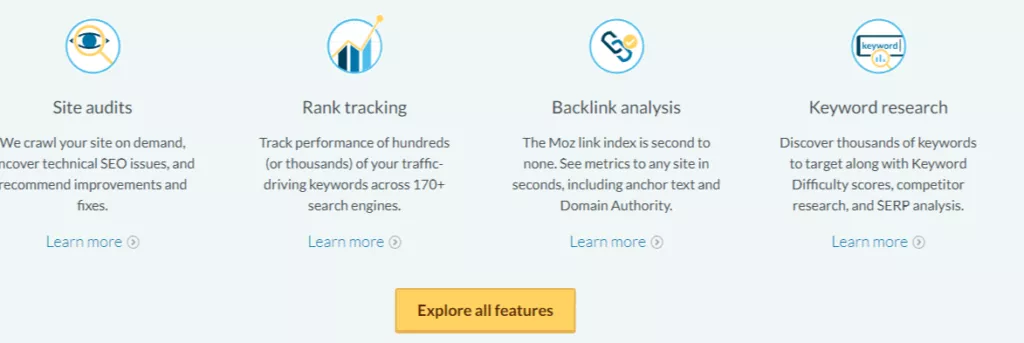
An SEO marketing tool like Moz is necessary to give insights on rankings and shifts that affect the SEO landscape, especially with the frequency of Google algorithm update roll-outs. It can also expose you to new opportunities to increase your competitive advantage.
Moz is favored in the SEO community for its capability to produce a transparent overview of website performance. You can optimize each page on your website based on the findings you gather from the reports.
Though you can expect to pay for this due diligence, it is also accessible as a free Moz toolbar download.
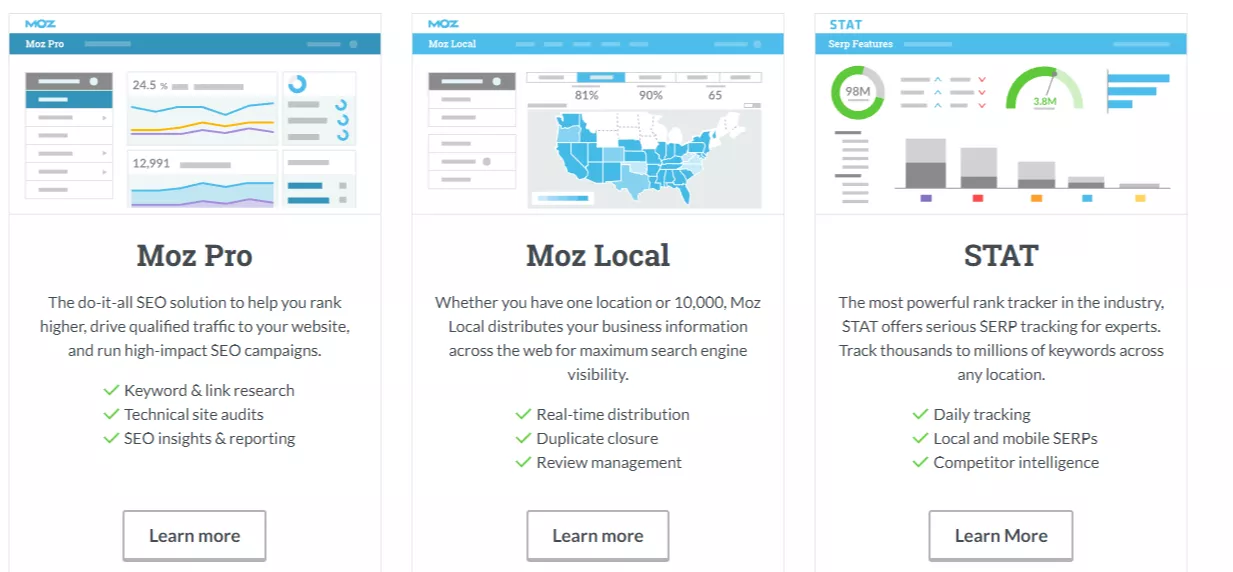
Taking advantage of Moz’s page optimization features can help you learn about the following:
- Search Traffic
- Search data
- Keyword targeting
The Page SEO Checker tool will help optimizers monitor rankings and keep up with the key areas that stand to be improved by offering performance-enhancing recommendations.
Features
- SEO education
- Business listing
- Profile optimization
- Review management
- Publish new updates and offers
Pros
- Free SEO tools
- Site audit
- Rank tracking
- Keyword research
- Backlink analysis
Cons
- Expensive
Google Search Console
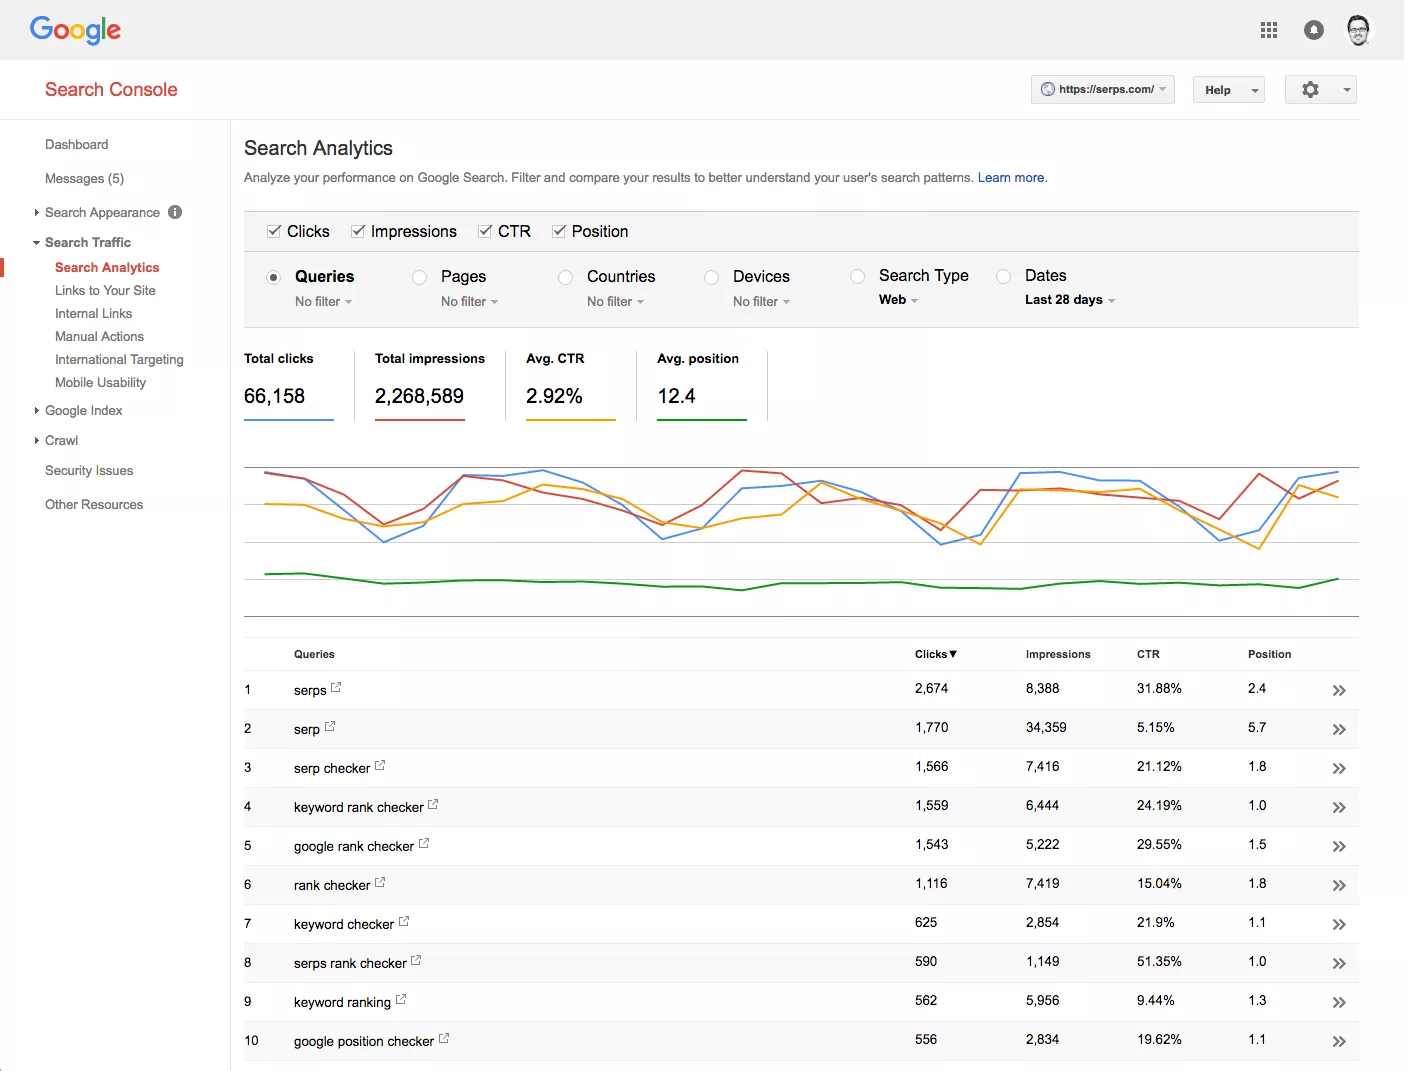
This is one of the free SEO tools we were talking about. In a nutshell, this Google-sponsored tool reports what factors most influence your website’s presence in Google SERPs.
Factors such as your website’s visibility in Google’s search results, its usability, your content (especially keywords) usefulness, and its ranking. It also highlights who visits your website through Google’s search engine and how they interact with the efforts you have set to attract them.
This boosts your user experience optimization by having an overview of your impact on Google’s audience. This is especially true when monitoring which devices they use, such as the boost in mobile usage (AMP).
You must copy a tracking code from Google Search Console to paste into your website’s HTML. Doing this will help you gain knowledge on the crucial parts of your SEO campaign.
You can expect to get the following insights from the Search Console reports:
- Page index
- CTR
- Backlinks
- Geographic targeting
The Google Search Console offers index changes made to your website immediately instead of the usual waiting period. However, registering with Google Index can take weeks and even months.
Google Console is also said to help with chasing off cyber threats. This should be handy for a business/establishment vulnerable to malware and spam attacks.
Features
- Sitemap submission
- AMP tracking
- Rich results
- Mobile usability
- CTR tracking
Pros
- Free
- Search Analytics
- Detailed insights
- Review index coverage issues
- Alerts
Cons
- Nothing so far
Recommended Read: How To Scale Your Amazon Business Using Sellzone?
Respona
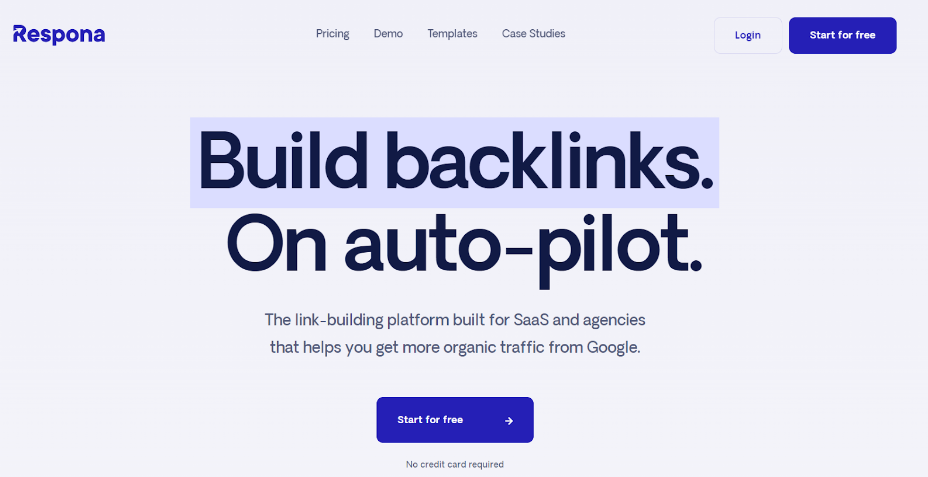
Respona is a feature-rich link-building and outreach tool that serves to establish high-value connections for your brand.
The software centers around automating the outreach process, which saves your brand time and resources, subsequently accelerating the rate at which your website’s visibility increases.
The Starter plan starts at $197/month.
Respona strives to carve valuable time out of the outreach process. It does this by providing users with the ability to automate everything from finding fitting opportunities to personalized email sequences.
Whether you need to monitor new blog posts, guest post opportunities, or build links at scale, Respona automatically finds relevant opportunities for you.
On top of that, you can use the Respona dashboard to monitor your progress with each outreach campaign, observe the performance against goals, and manage multiple projects for clients or various businesses.
Features
- Automated outreach process
- Personalized email sequences
- Backlinks checker
- Link prospecting
- Email finder
- Automated follow-ups
- Email analytics
- SEO filters
- Recurring campaigns
- 14-day free trial
Pros
- Comprehensive outreach platform
- Automated processes
- Effective link building
- Quality prospect filtering
- Targeted email sequences
Cons
- No free package
KWFinder
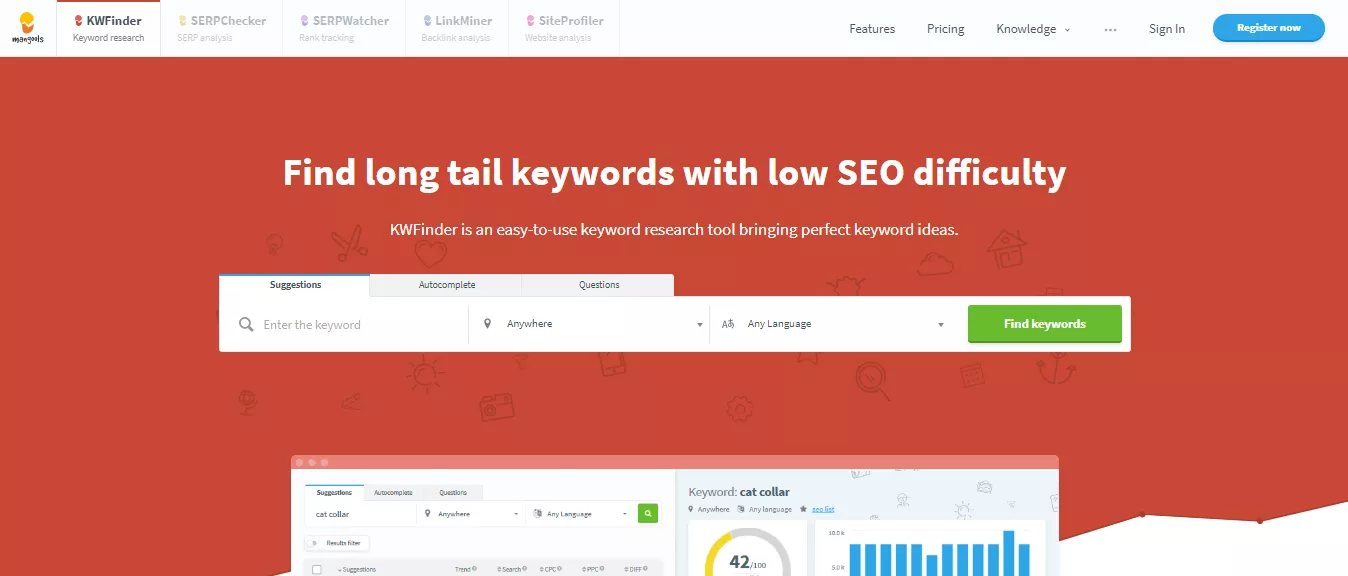
As for KWFinder, we’ve found that it caters to a powerful keyword research and management tool with a straightforward user interface. The paid subscription starts at $29 per month, billed annually.
The subscription offers a generous 100 keyword lookups per 24 hours and other valuable benefits you can find here. In addition, this SEO tool has a free plan that allows a user three keyword lookups every 24 hours. You can also try the 10-day free trial.
Overall, the tool is excellent for focusing on all the information that involves a single keyword. However, it balances this out by catering to long-tail keyword combinations.
The ‘Rank Tracker tool provides keyword suggestions as part of its package. This gives users insight into data that covers a keyword’s search volume, the average cost per click, competitiveness, difficulty score, or if the keyword is trending.
Users get the capacity to find low-competition keyword combinations that have a search volume that should boost their rankings. When you find a suggestion you like, you can add it to your list of keyword suggestions on the tool.
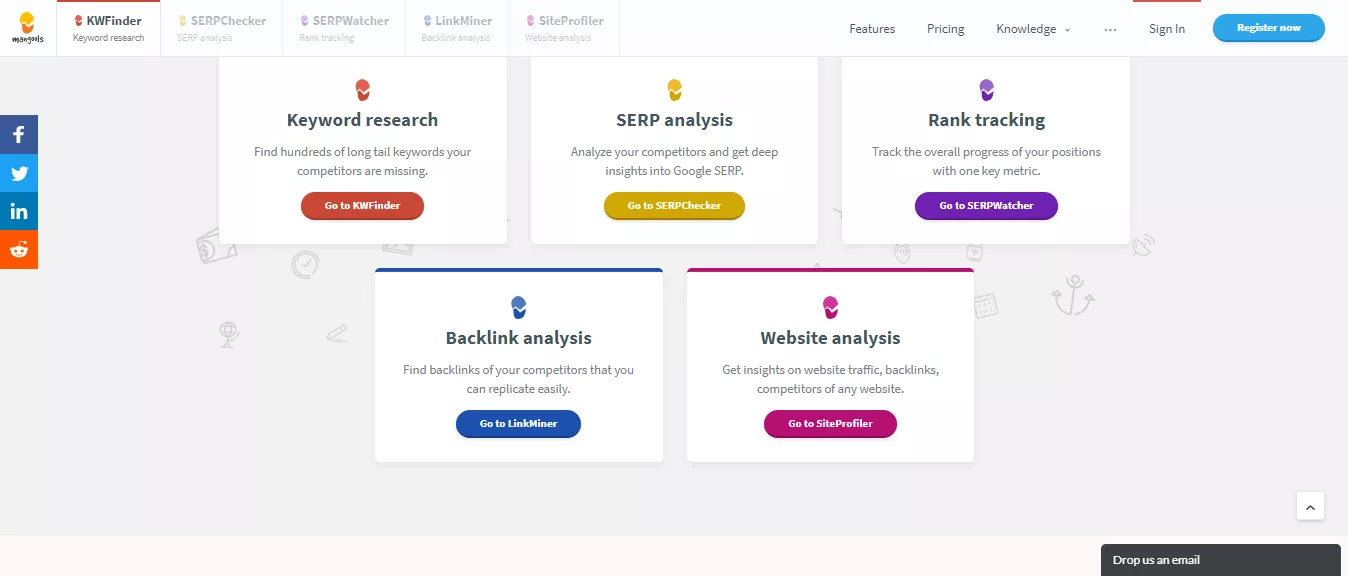
The dashboard is easy to navigate and offers the convenience of importing or exporting a list of keywords, and analysis reports as a CSV or TXT file.
Features
- Competitor analysis
- Search volume
- Keyword historic data
- Geo selection
- Language selection
Pros
- Domain analysis
- Organic keywords filtering
- Paid keywords filtering
- SERP overview
- Keyword difficulty
Cons
- Free version is limited
$This is an affiliate link
Semrush
Semrush is always in the Best SEO tools lists we’ve come across. It earns its authority from being an SEO keyword research tool famous for boasting an extensive keyword database.
It doubles as a marketing tool, making it efficient as both an SEO & SEM tool. Helping to measure and track your campaigns, evaluating your performance, and your competitors to keep you efficient in your market.
Related Read: 7 Semrush Updates From 2020 You Need To Check (Explained)
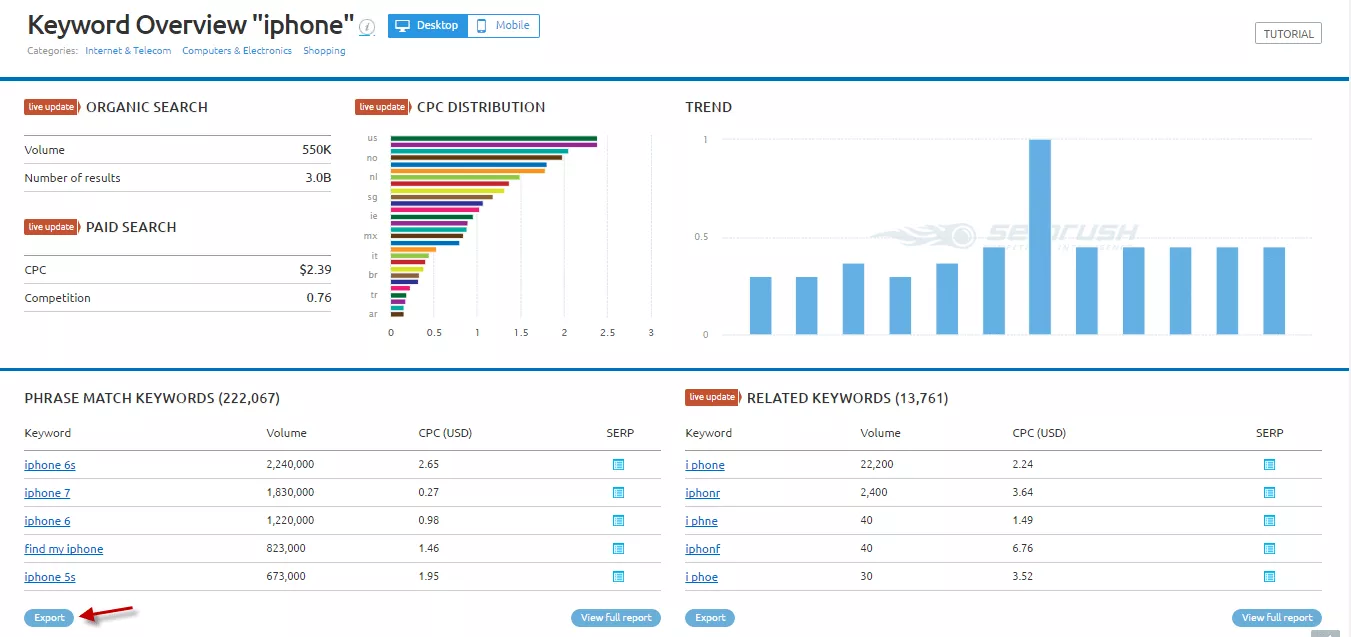
The API integration makes it compatible with Google Docs, Google Analytics & Google Search Console. That’s three times the advantage and convenience.
You can use it as a domain comparison tool to match your website’s meta information, such as search data, traffic insights, back-link monitoring, position tracking, and other ranking factors against another website, through an analysis report that can be accessible in PDF format.
A competitive edge can be gained from these findings by making your content unique and your user experiences a cut above the leading competitors in your niche.
You can tweak your website’s performance with the On-Page SEO Checker Tool.
The dashboard enables users to look at the keywords in their content with the Topic Research tool, keep a finger on the pulse of the social media shares they are collecting, and get backlink ideas.
The one-click posting feature supports multimedia posting across many social media channels.
Features
- Keyword overview
- Position tracking
- Social media handling
- Content marketing tools
- Ads tools
Pros
- Freemium
- Better keyword research
- Competitor analysis
- Backlink analysis
- Traffic analysis
Cons
- Super expensive
$This is an affiliate link
Recommended Read: Best SEO Tool: Semrush vs. SimilarWeb?
BuzzStream
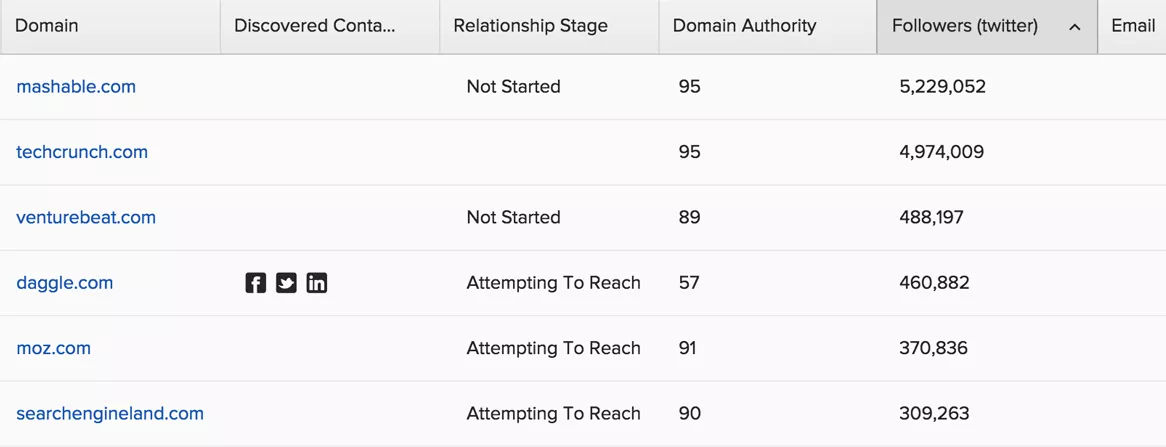
Buzzstream is a web-based CRM software with workforce and email management automation capabilities. With the Sequence feature, you can access emails, track, and follow up on your email outreach and link-building projects all in one place.
You won’t need to cross-reference tasks on a spreadsheet anymore. Buzzstream has a Chrome plugin that can help to manage and track campaigns within your browser. In addition, users can integrate the software with social media and other API-supportive platforms.
The Discovery feature helps with your content marketing efforts. You can look for experts, influencers, and bloggers by inserting your query in the search bar. A list of recommendations will appear on the interface. You can filter these results to get your ideal candidate. There is an option to add them to your prospects lists for consideration if you can’t decide on the spot.
Here’s a quick look at how you can schedule tasks and track your team’s workflow throughout a particular project.
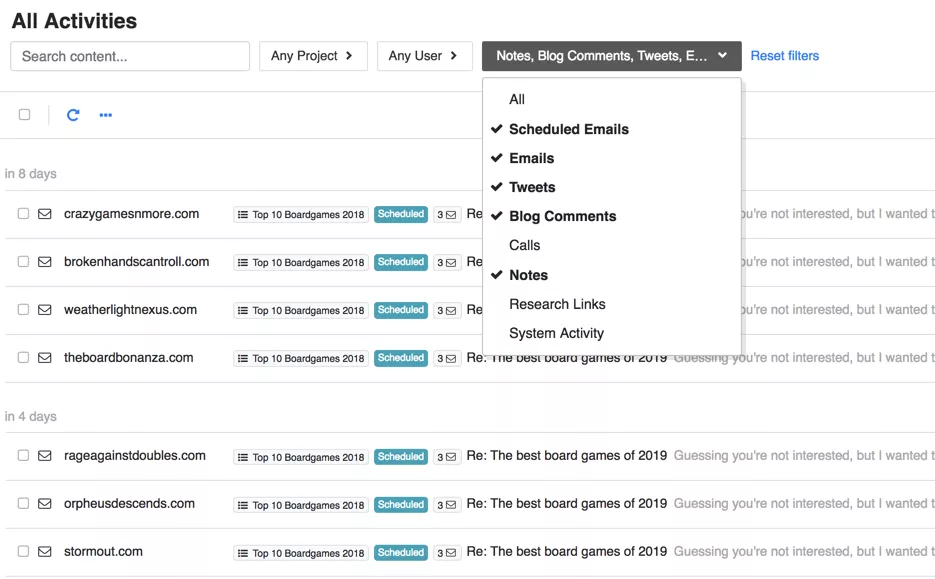
Buzzstream can handle your back-link strategy by monitoring who is linking to you. Then, if you get stuck, their notoriously efficient customer services can walk you through any issues you run into.
Features
- Best outreach CRM
- Build qualified lists
- Send emails
- No lost emails
- No overload
Pros
- Easy to use
- Use data to improve
- Best for link-building
- Best for content promotion
Cons
- No free version
ATP (Answer the Public)

A free keyword research tool like ATP can help produce informational long-tail keywords. ATP is a combination of SEO and marketing capabilities useful for the Press Coverage Reporting aspect of your content distribution to the public.
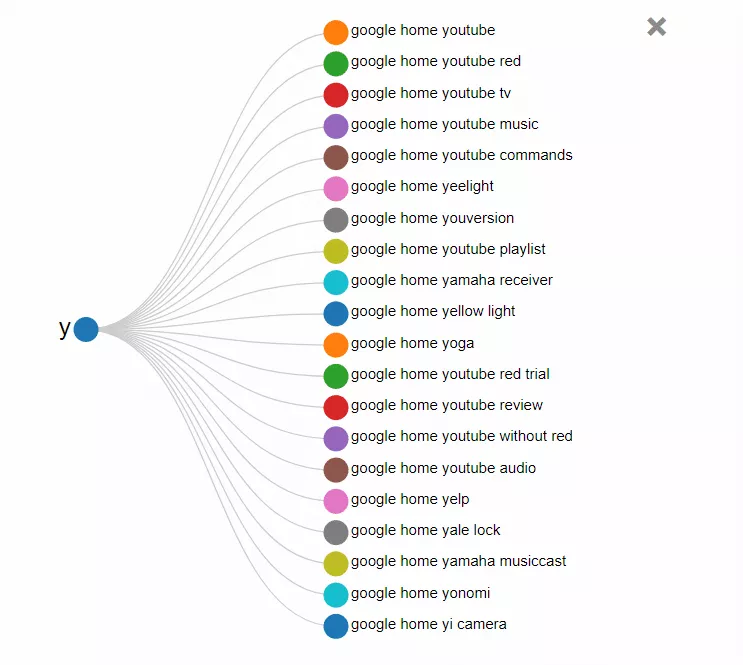
You can generate many content ideas for your audience from such access to consumer insights. A bulk of questions is supplied by ATP when you enter your query in their search bar and can be accessed in a list form or a circle.
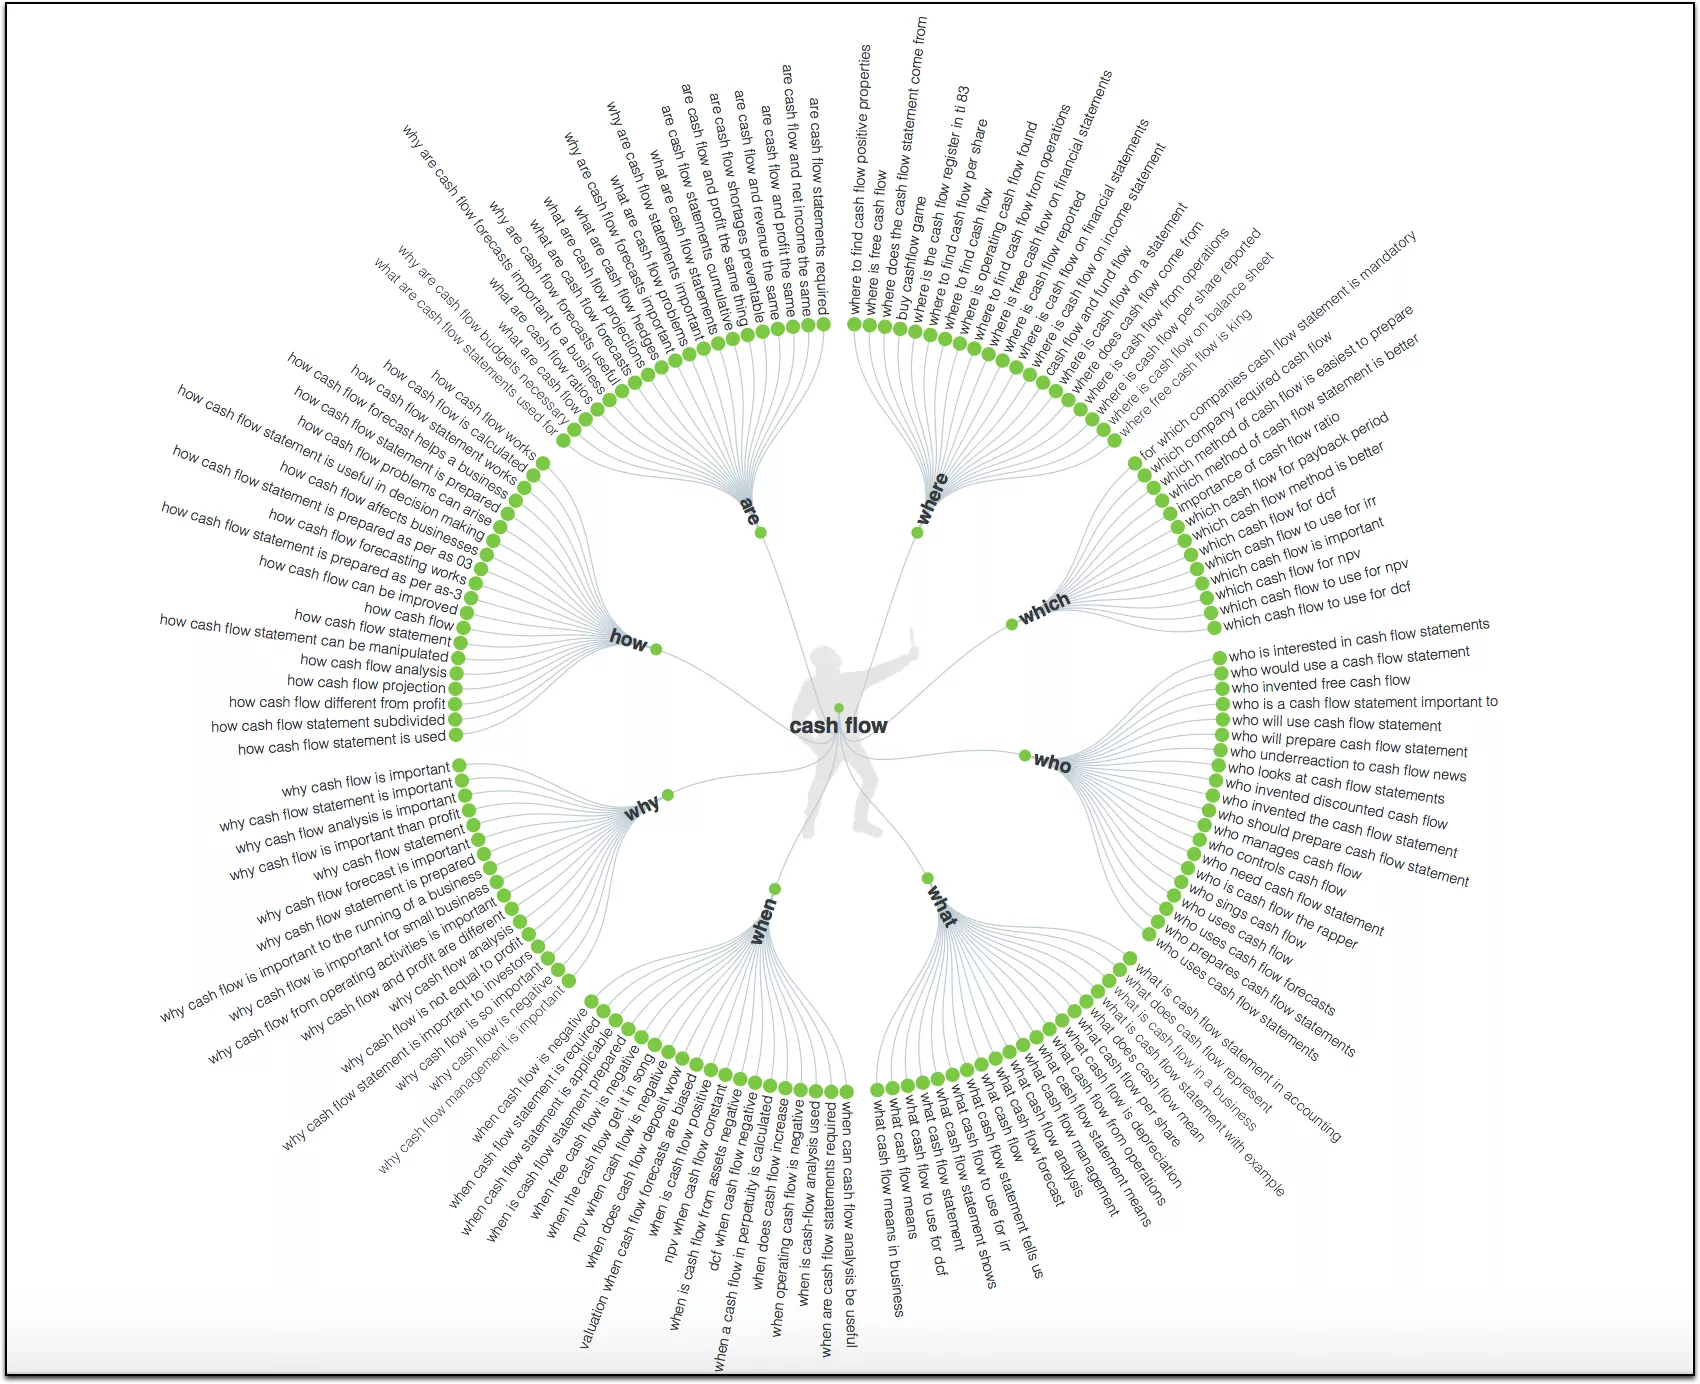
Preparing your content with strong hints of your audience’s motivations can help make you a leader in efficiency within your market.
ATP’s ability to produce buying intent keywords makes this easier to draw in organic traffic with the content in your topics. This can be useful for targeting your audience with reviews and buying guides.
Features
- Buyer keywords
- Long tail keywords
- Multiple filtering options
- Keywords based on Alphabet
Pros
- Freemium
- Easy to use
- Advanced
- Country search
- Multiple languages
Cons
- Premium upgrade required for more features
Ubersuggest
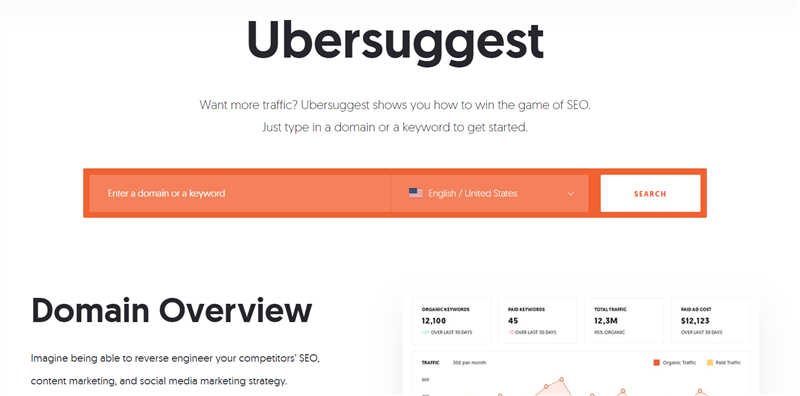
SEO guru Neil Patel’s free keyword tool can be used to gain an edge in your market. Ubersuggest is a free hack to use to boost your website’s ranking. You can get insights into your competitor’s content marketing strategies on its user-friendly interface.
Peeking into your internet neighbors’ SEO, content & social media strategy implementation can be a practical way of getting insights regarding working methods. Such understanding takes you beyond the limitation of relying only on data insights.
Suppose you know that generating keyword ideas to implement in your content strategy is the first step to improving the relevancy of your content. In that case, this will keep you from posting content your audience is not interested in.
This is what you can expect from Ubersuggest:
- Keyword volume
- Keyword competition
- Seasonal trends
- Social network shares
- Number of backlinks
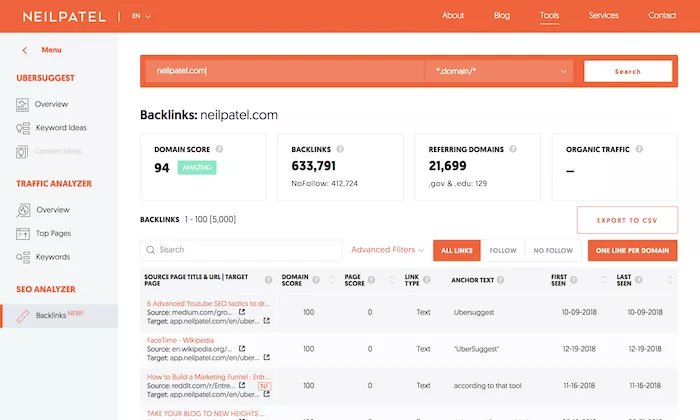
Building your link profile with the tool provides a view of your competitor’s backlinks. This should help you figure out which links to add to your own. In addition, knowing which websites your audience is linking to can narrow the scope of prospects to approach in your niche/industry by a great deal.
Features
- Domain Overview
- Top SEO pages
- Keyword Suggestions
- Content ideas
- Backlink data
Pros
- Freemium
- Affordable
- No additional account is required
- Easy to use
Cons
- Nothing so far
SpyFu
For search marketing, SpyFu offers a reasonably priced cloud-hosted tool structured around increasing efficiency for marketing campaigns. It is believed to be an entry-level to advanced business software solution. Its enterprise plans start from $33 per month.
When coming up with a marketing strategy, you will need a tool that makes it easier to gather information on your competitors. Spying on how they execute paid ads, collect profitable keywords, and the likes will help chart your course. It manages this intelligence by zeroing in on your competitor’s Google SERPs and Adwords activity.
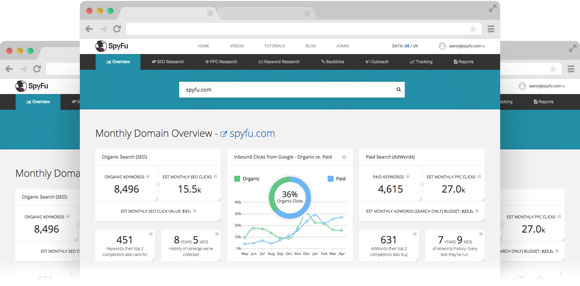
You can track your competitor’s marketing methods on Google and their Organic Ranking and Paid Search history on AdWords for the last nine years.
Searching any domain active on Google will also present an overview of vital information you can use to get ahead. This information is part of SpyFu’s capacity for showing what keywords they have purchased, the ranking of their organic reach, sales leads, contact details, and the likes.
Features
- SEO competitor analysis
- SEO keyword search
- Rank tracker
- Domain comparison
- PPC keyword research
- Backlink checker
Pros
- Domain Overview
- SEO report
- SERP checker
- Google Ads templates
- Ad history
Cons
- A little expensive
$This is an affiliate link
Yoast SEO
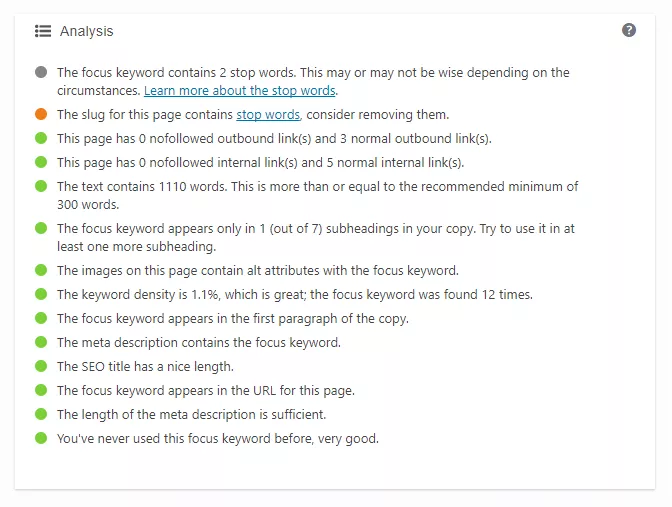
You no longer have to worry about whether your article is SEO-friendly. When producing SEO content, it can be hard to manually evaluate whether you are effective or not. Instead, WordPress users can set up the Yoast SEO plugin on their website. It analyses which parts of your articles can be improved to boost their SEO ranking.
These include readability, scannability, writing voice, meta-descriptions, image alt tags, and more. It can also keep you from over-optimizing your content by offering suggestions to keep you within the required number of keywords/keyphrases to use.
You can expect a:
- Readability analysis
- Insights tool
- SEO analysis tab
It is easy to fall into the trap of creating content that only focuses on ranking in search engines with such a tool. Instead, writing natural content for readers and using the tool along with an LSI keyword tool or a thesaurus can help you appeal to your audience and search engines.
Features
- SEO analysis
- Robots meta tag
- Outbound links
- Breadcrumbs
- XML sitemaps
- Google preview
Pros
- Multi keyword optimization
- Duplicate keyphrase check
- Structured data
- Breadcrumb control
- Social preview
Cons
- Need to use the premium version for improved features
Bonus: Nightwatch
Nightwatch is an all-in-one SEO tool for companies focused on scaling their internet business. It is exceptionally good at segmenting and visualizing data with its intuitively designed dashboard.
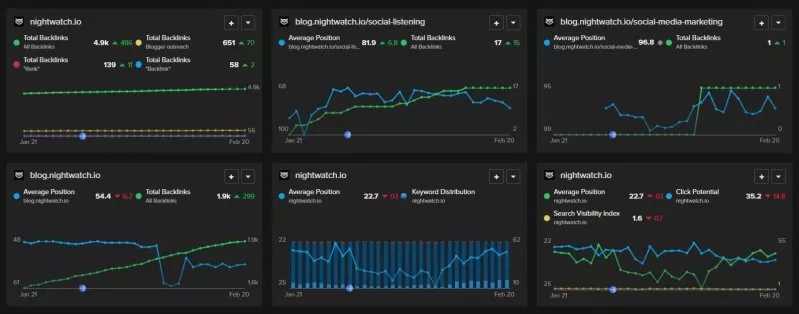
One of its latest features allows you to perform site audits in the tool. You can easily customize the settings to your own needs. Get a simple overview report, or set the parameters as you wish to get an in-depth understanding.
You can also choose custom filters to focus on specific issues you’re dealing with. With their smart scheduler, you can easily set up your crawls and have them run and save automatically. You can set your insights on different professional SEO projects, filter your needs, create a steady time frame, and compare data in the long run.
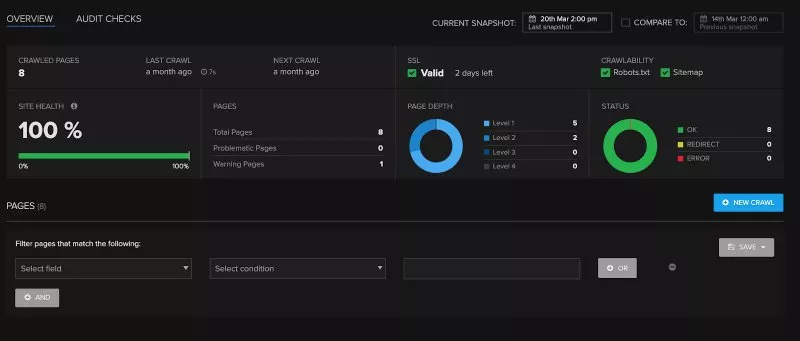
Overall, it’s a great tool if you’re looking to perform all your SEO tasks on one platform. In addition to their range of paid plans, they also offer a free Chrome extension: SEO Search Simulator by Nightwatch.
Conclusion
We avoided listing some SEO tools that have the same function. Instead, each of these SEO tools caters to every different corner that shapes the structure of an SEO campaign and SEO as a whole to make a big difference to the ROI of your efforts.
Bookmark this for further use. Every SEO engineer, marketer, and regular internet entrepreneur can find a tool best suited for improving their SEO and conquering the World Wide Web by keeping this with them. Feel free to share your experiences and this article with your community. You might be getting someone out of their rut by doing so.
Note: This list of the best SEO tools is contributed by Pollen Lekau. Check our guest blogging guidelines if you have a fantastic article to contribute.
About the Author

Did you find the article useful?
Then pin me to your Pinterest Board, so that more people will find me
(Remember: The more you give to the Universe, the more you will get from the Universe)
So, Pin meEnter your Email Address below and be the FIRST to receive our Blogging Tips.
Reader Interactions
Comments
Leave a Reply
You must be logged in to post a comment.


andrewecok says
Thanks! I really appreciate your mentioning the best SEO tools already i used all of them. These are really useful for every SEO specialist.
BlogHeist says
Hey Andre!
Thanks for appreciating,
It’s good to know that you already find them all useful.
That serves as a recommendation to our article.
Reach us at: https://blogheist.com/contact-us/ in case you have any query.
Harley Swanson says
Hey Nirmal,
Thanks for sharing a best SEO tools with us. and also thanks for the time and efforts. By the way Ahrefs is a too costly tool but can we buy it through Group buy?
BlogHeist Support says
Hey Harley,
We’re glad that you found my suggestion helpful.
Ahrefs is certainly a powerful SEO tool, but as you mentioned, it can be costly. Group buying can be a way to save money.
Before participating in a group buy, it’s important to do your research and make sure that the group buy is legitimate and that you understand the terms and conditions of the purchase. It’s also important to be aware of any potential security risks and to carefully protect your personal and financial information.
We hope this helps! If you have any other questions, please don’t hesitate to get in touch. https://blogheist.com/contact-us/
Rizwan says
Thank you for gathering the best SEO tools
devin says
Thank you for giving this very valuable tools information regarding seo.
I used all the tools its very effective.
Sweety kumari says
Hey Nirmal,
I know SEO is very helpful for any blog because it makes traffic.
Commenting is one such a way to get connect with bloggers.You have mention all the good seo tools in one list which is awesome and easy to choose which is good for use.
Thank you
Sweety
Sathish Arumugam says
A good compilation of best SEO tools. But my vote goes to Ahrefs and SemRush. You can easily get potential keywords by using the SemRush magic keyword tool. Also, Ahrefs is a best tool to steal competitor backlinks.
Nirmal Kumar says
You are right on the spot, Sathish. In fact, I am using the same combination. Using Semrush for identifying keywords and Ahrefs for identifying competitor backlinks.
But, Sathish, could you let me know what are your tested and working methods for getting backlinks from good authority domains. When I say a website with good authority, there is a higher chance for emails not even being responded to. In that case, what would you do?
Sathish Arumugam says
Nirmal,
That’s quite a hard one, indeed. However, following them and building a strong relationship would help. Blog commenting is one such a way to get connect with bloggers even experts. Most importantly, sending outreach emails as a stranger never works. It is always obvious to pick a one, follow, become a friend and then request.
Nirmal Kumar says
That’s true Sathish.
Sending Outreach emails to strangers has never worked for me.
In the past, I have tried connecting with other Bloggers and Experts by commenting on their blogs. Even after dropping some valuable comments, I have noticed that they never get approved. I often wonder why a comment gets rejected. Have you come across similar situations?
Aria Mathew says
Thank you for gathering the best SEO tools. I have used all the tools you described
Nirmal Kumar says
That’s so nice to hear, Aria. But then what are the tools you are using on your website now?
And what tools do you recommend others to use?