Formidable Forms Review: An Easy-To-Use Form Plugin
There are numerous Form Plugins in WordPress, and no doubt about it. The reason for too many form plugins is that forms are the best way to collect data from your users. The data being collected is very vital for your business.
These data can even be collected from payment forms. That shows how vital and authentic the form is. Today, we will see a review of one such form plugin. It is a Formidable Forms.
What Are The Features of Formidable Forms?
We will see that. I will list down the basic features of Formidable Forms.
- Customize Form HTML – If you are not interested in the default form layout, you can use your coding skills to style it the way you like.
- Send Email Autoresponders and Notifications – As soon as your visitor fills out the form, the entries will be mailed to whomever you want to send them.
- Mobile-Friendly Responsible Forms – All these forms are mobile-friendly and can be created with a drag-and-drop editor.
- Form Templates for Instant Form Building – With default templates available, you don’t need to create Forms right from scratch every time. Start with the template and modify what you need. Also, check the Formidable Forms library for more useful templates.
- Invisible Spam Protection – Powerful spam protection techniques are deployed to protect your form from spam entries.
And these are some exciting features I came across at Formidable Forms. But, unfortunately, these are all available only in the Pro version.
- Fill out Forms Automatically – Instead of making the users type each and every value, you can prefill some data, making your audience’s work easier.
- Simple Entry Management – You can edit, search and delete entries. Thus offering powerful data management features.
- Multiple File Upload Forms – This feature allows your visitor to upload multiple files. These files will be saved on your website safely.
- Smart Forms with Conditional Logic – The Conditional Branching feature will cut your users’ fields and options and make it look easy.
- Powerful Calculated Fields – This is the most exciting feature I have seen with this plugin. The fields can calculate numerical values based on inputs.
- Create Reports with Graph and Chart Form Data – For new insight, you can create graphs and charts with the Form data.
- Schedule Forms and Limit Responses – You can decide when the form should open and close.
How To Create a Form With Formidable Forms?
There are different memberships available on Formidable Forms, and for this review purpose, I am using the lite version. You can download and install the free Formidable Forms Plugin.

Once you install and activate the plugin, choose Formidable -> Forms (Lite) in your WordPress sidebar.
This is the page where you can find all the forms you have created. To create a new form, click Add New.

The following page asks you to choose the layout. You can start with a blank form, use an existing template, or import your form.

For this tutorial, I am going with the blank form to show you all the field options available. Now, that brings you to the Editor page.

This is the place where you can customize how your form looks like. And the best thing is that it is user-friendly. For example, it has already come up with helping arrow symbols to guide you.
You will have to add a Form name in the build section and drag and drop the fields you require. Once you have finished all the settings, click the “Create” button.
The settings section will allow you to modify your preferences for this form, and the Entries section will let you see the Entries you received for this form.
The most important thing with form creation is adding your form to the post or page.
Go to the Forms (Lite) page, where all your forms will be displayed. Then, copy the shortcode and paste it where you want to show it.
Related Read: How To Integrate MailChimp With WPForms and Gain More Subscribers?
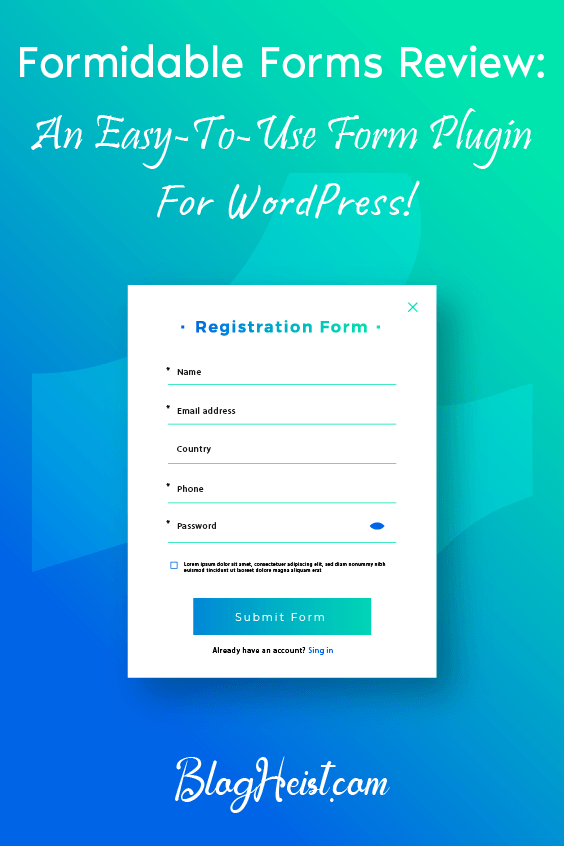
I have created a simple form, and this is how it looks.

Note: You can customize the style of the form. You can do that on the Style subpage under the Formidable menu. This is what the Style page looks like.

Formidable Forms Add-Ons
Apart from the features, Formidable Forms has many Integrations available. You can integrate by installing an add-on. However, these add-ons are available only for Pro users.

These are just a few add-ons that I captured for the screenshot. There are a lot more available.
Set MailChimp Tags from Formidable Forms
Ensure that you purchase the Plus plan or above for the MailChimp add-on. Higher goals will give you more unique features and integrations. Basic plans will provide you essential features and integrations.
In each plan, you can create unlimited forms without any restrictions.
Once you have installed and activated the plugin, now, you need a form created using the Formidable Forms plugin. You can quickly complete a new contact form or use an existing one. In this case, we will be making a new one.

Once you have done that, install and activate the Formidable MailChimp add-on. This is an essential task.

When you add, activate, and properly configure the add-on, you can easily sync your contact forms with your MailChimp account, lists, etc. From the Formidable Forms general settings, you can see the MailChimp configuration.
Without logging in to the MailChimp account, you can manage everything. This will probably save a lot of time!

Edit a form that you created. Open the form editor.

Under form actions, search for MailChimp and click it.

The plugin will open up the Mailchimp configuration now.

You could use the tag option from the text field. Once you have selected the Mailchimp list, the plugin will show you more customization options.

When you need to add 2 or more tags, add them as comma-separated (,). The changes will be saved to your MailChimp account.
In this example, we will show you how to assign WordPress and SEO tags here. As we mentioned above, you can add those with commas separated. Update the form, and you are done!

This is how you can easily set MailChimp tags from Formidable Forms.
Ecommerce Forms
If you purchased the Pro or any higher plan, you could get the new fields from your form-building wizard. You can add them to an entirely new form or an existing form.
With the new feature, you will be able to create the following:
- Calculation Forms.
- Quote Calculators.
- Estimation Calculators.
Etc.
Now, go to the form builder and create a new form. You could name it as you like. Plus, the Pro version plan comes with the form templates feature, and there must be some pre-made forms.
You could import them to your builder or can create one from scratch.
On the left side, you could see the fields.

You could see fields like:
- Product.
- Quantity.
- Total.
You can add those fields to your form to show it. You are good to go. Just drag and drop it to the wizard!
Just like the other form fields, this can be configured. For example, the configuration of the Product field is below.

Also, the Quantity field:

And the whole area can be configured!

The system will calculate the total amount automatically.
And once you got saved the form and embedded it on a page/ post or custom post type, you could see something like this:

Pretty cool.
Once the customer submits a form, you can contact him personally via email.
We have embedded an eCommerce form inside our blog without writing a single line of code. Hiring a WordPress developer will charge you around $100/ hr. If you do the math, that will cost you a good amount of money.
On the other hand, with Formidable Forms, we can create the same forms with simple mouse clicks!
By properly using this feature, you could generate more revenue from your existing and new customers. The excellent point is the new feature will help you to remove extra plugins and save money by not hiring a WordPress developer.
The eCommerce forms that are built using Formidable Forms are entirely responsive. The forms will look beautiful on every display size! Whether your customers use a desktop, a tablet, or a mobile phone!
Allow users to Preview Before Submitting Form
Start by creating a new form. Thankfully, Formidable Forms premium comes with a feature called Form templates. There, you will see pre-made form templates, and you can easily import them to your form builder wizard.
On the left side, you will see the fields which you can be used. The right side will pull a live preview of the created form.
The recent update of Formidable Forms comes with a new field called Summary.

By default, the field will add every field and show them. Thankfully, you can exclude custom fields from the summary or completely exclude custom field types.
Save the form.
Embedding the form is also simple. You can do this without adding any custom codes. Everything can be done using shortcodes.
Formidable Forms is also optimized for the WordPress 5.0 version (Gutenberg). You can add the Formidable Forms block to the Gutenberg editor and choose the form you created.
And after that, publish/ update the page or post.
In the front end, you can see the form. And once you have started filling it, you will see the summary field at the end.

You can only add one summary field per each form. So, we recommend adding the summary at the end of the form. It will make sense.
This is how you can allow users to preview before submitting a WordPress form.
Send Confirmation Emails
When you create a new form, on the left side, you can see the fields. Drag the fields you want from there and drop them on the right side. You can see the changes right away in the form preview section.

Once you have added the fields to the form, move to the Actions & Notifications tab.

This is where you can integrate your forms with services like PayPal, eCommerce, MailChimp, etc. From the list, choose the Send Email option.
You can customize your autoresponder from there.
There, you need to add your
- To address.
- CC or BCC.
- Custom Subject Line.
- Custom Message.
Everything can be configured additionally. The plugin will default send you all the form fields as the message. But if you wish to customize and add a unique one, you could do it!
All you need to do for that is remove the [default-message] shortcode from there and add your message. If the plugin sends emails in HTML and you don’t want it, select Send Emails In Plain Text.
Now, you are good to go.
Formidable Forms is optimized for WordPress 5.0, aka Gutenberg. So while you need to show a form on a page or post, all you need to do is, use the formidable forms block in the editor and mention the contact form you just created.
On the other hand, if you use the old-style classic editor, copy the shortcode of the form you just created, paste it into the content area, and save the form.
This is how you can send confirmation emails in WordPress. With a plugin like Formidable Forms, it is simple to configure everything.
You probably know about autoresponders if you use a shared hosting that comes with cPanel access. You can see an option called autoresponders in your control panel right below the email configuration.

From there, you can customize an autoresponder. So, when someone sends you an email to your business email address, the autoresponder bot will automatically reply to the visitor or customer.
But the sad thing is most WordPress hosting companies will limit the emails that can be sent in a day. So, if you exceed the limits, this won’t work well for you.
Add Images to Polls
By default, when we create a poll, the buttons will look like this:

Usually, there will be 2 styling options.
- Checkboxes.
- Radio Buttons.
And with some modifications, we will be able to turn these default stylings to:

Impressive, isn’t it?
So, let’s start.
First, you will need to purchase the premium version of Formidable Forms. Even the basic plan comes with the surveys and polls feature.
Once you have purchased the plugin, log in to your Formidable Forms account and download the plugin files. And after that, log in to your WordPress blog, and install and activate the plugin. You can also get a valid license key from your Formidable Forms account dashboard.
Formidable Forms also comes with a feature called form templates. You will get all their pre-made templates right in your builder if you have activated it.
And choose a poll template or create your own one from scratch.
Go to the Radio Button field settings. From there, you can see the button to image option.

Enable that option.
The very next thing you need to do is choose the image size. As of August 2020, there are 4 custom image sizes.
- Small.
- Medium.
- Large.
- Extra Large.
You can choose the preferred size for your image options from the dropdown.

Now, it’s time to upload your poll images. You can enter one option and add an image for the option from the same page.

After configuring these things, save the form.
Thankfully, Formidable Forms is 100% optimized for Gutenberg. So, embedding the forms might be pretty straightforward. All you need to do is, use the Formidable Forms ‘ Gutenberg block to the page/ post or custom post type.
On the other hand, Formidable will give you a unique shortcode for every form you create. So if you are still using the classic editor, paste the shortcode and publish/ update.
If you check the front end, you can see the live form.
That’s it!
Integrate with AWeber
Before we start, you need at least a Creator plan of Formidable Forms.
Under the Formidable Forms add-ons, you can see all the available add-ons. Simply install the AWeber add-on from the page.
The next thing you need to do is, set up the authorization ID. Under the Global Settings page, you can see the AWeber integration configuration.

If you already have one auth ID, that’s great. You can use that key in the field. However, you can easily create one from here if you don’t have one. Simply enter your AWeber login credentials, and you can create one.
Copy and paste the AWeber authorization ID into the Formidable Forms authorization ID field.

Save the settings. You are done!
So our primary goal is to add the email address automatically to our AWeber mailing list when someone uses the form. So, integrating the AWeber with forms will do the job.
Go to the plugin settings, actions, and notifications. You will see something like this.

There, go to form action. 4 configurations are needed.
- Label
- List
- Full Name
- Email Address
The label is something we use to identify. It might not be visible to the website visitors. Your AWeber lists are already synced in the system. If you have more than 1 list, select the list you prefer. It’s required.
Next is the name and email. Again, formidable will identify them by using the fields. Configure them accordingly, and you are good to go.
We could use the Conditional Logic feature by Formidable Forms to make the forms more powerful. For example, you can easily trigger a specific action according to the user’s activities.

Update the settings once you have saved it. Configure each list separately if you prefer adding the email to more than 1 list. For example, from form action configuration, we could do this.

This is how you can integrate Formidable Forms with AWeber.
How to make a Quiz In WordPress?
Under the add-ons section, you will see the Quiz Maker add-on.

After installing and activating the add-on, you are good to go. You can create a new form on the website or edit an existing form. In this case, we will show quiz creation in a brand-new form.
So, just create a new form.

You can give any name to your form. The form’s name won’t be visible to your website visitors. It is just for identifying the form inside our WordPress dashboard. And you will need to add some fields to the form.
As I mentioned above, Formidable Forms comes with a drag-and-drop form-building wizard. You can see all the available fields in the left panel. The live preview will be shown in the right section.
All you need to do is drag fields and drop them in the preview.

And then, you can start adding the quiz questions. At last, you will need to add the Quiz Score field to your created form. The field can be found in the regular fields section in your left sidebar.
You need to add the quiz question and the correct answer. The answer keys will be used for scoring purposes. If you love a fancy way to show the final quiz results, there is an option available called Formidable Forms views. You can utilize it for showing image results, not the old-style scores.
Finally, we can publish the quiz and let our website visitors know about it. The Formidable Forms plugin will generate a unique shortcode for every form we create through the plugin. You can use the shortcode on your editor for embedding the form.
Plus, the plugin is compatible with WordPress 5.0, aka Gutenberg. If you use the Gutenberg editor on your blog, you can use the Formidable Forms block to embed it.

It’s the simplest way.
Search for your form and add it to your page. Once you have done that, publish or update your page. If you check the page from the front end, you can see the live action of your WordPress quizzes!
So when someone answers the quizzes according to our answer keys, the quiz result will be shown. You can add unlimited quiz questions and answers to a quiz form. That’s an excellent feature.
Pretty simple, isn’t it? With social shares and other promotional tactics, you can generate a good amount of traffic to this page.
This is how you can create quizzes inside your WordPress site: no coding, no additional CSS, nothing.
Formidable Forms Pros and Cons
Now, let’s see the most popular advantages and disadvantages of Formidable Forms.
Advantages
- Freemium
- Drag and Drop
- Create Unlimited Forms
- Powerful Integrations
- Great Support Team
- Helpful Documentations
Disadvantages
- Nothing so far
Formidable Forms Pricing
As I said earlier, Formidable Forms has both Lite (Free) and pro memberships.

The above pricing shows the Pro memberships.
- Basic – $49.50/ year
- Plus – $99.50/ year
- Business – $199.50/ year
- Elite – $299.50/ year
You can click ‘Get Started’ for the package you want.
Also, they have a 14-day money-back guarantee. So if you are unsatisfied, you can get a refund within 14 days of your purchase.
Formidable Forms Review
A quick summary of our Formidable Forms review.
| Product Brand | Formidable Forms |
| Product Price | $49.50 |
| Product Rating |
Buy Formidable Forms Membership
Formidable Forms is one of the best WordPress plugins for creating forms without writing HTML or CSS codes. If you are interested in the plugin, check their lite version on a local WordPress site. If you’re looking to get a Formidable Forms membership,
$This is an affiliate link
Frequently Asked Questions
Some frequently asked questions about Formidable Forms are:
Formidable Forms Free or Premium?
Formidable Forms is a freemium WordPress plugin. It comes with a basic version with limited features and a premium version with more robust features and integrations.
How to Purchase Formidable Forms?
Once you have visited the website, pick a plan. Now, you will be redirected to the checkout page. From there, using your Credit Card or PayPal account, you can complete the purchase.
Is There a Moneyback Guarantee Available?
Yes. All the Formidable Forms premium plans come with a 14-day money-back guarantee. You can get a full refund if you are not completely satisfied with the features or support.
About the Author
Did you find the article useful?
Then pin me to your Pinterest Board, so that more people will find me
(Remember: The more you give to the Universe, the more you will get from the Universe)
So, Pin meEnter your Email Address below and be the FIRST to receive our Blogging Tips.


Leave a Reply
You must be logged in to post a comment.